|
|
 |
|
Creating Play lists for use in OmniFi using Winamp
Created and maintained by: CoZ
Now we come to the final steps of this documentation. Load up your copy of M3UFixer.exe.
The DMP1 software is based on the Linux OS and will not recognize the default Windows
directory structure. So, M3UFixer changes the play list that you just created in a way that
enables it be read and understood by OpenFi.
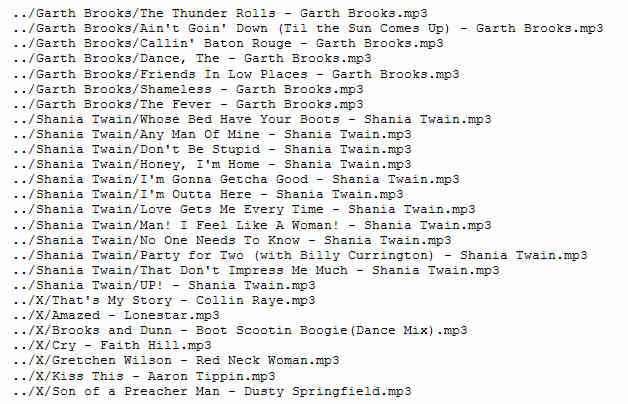
Not sure what I am talking about? Well let's fire up your favorite text editor and take a
look at an example of what your play list looks like before it's been put under the M3UFixer
"knife":
This is a relatively small play list since I do not have much Country Music and it probably
would not take that long to manually change everything to the way it is supposed to be.
But I would lose my mind if I had to sit here and change everything on my Classic Rock play
list. That sucker is almost 3 pages long! That is why M3UFixer is mine (and your) new best friend!
So, lets fire her up and get to work:
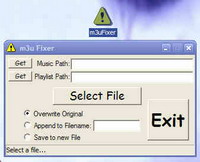
This is a relatively easy step and also the final one to get your play list in working order.
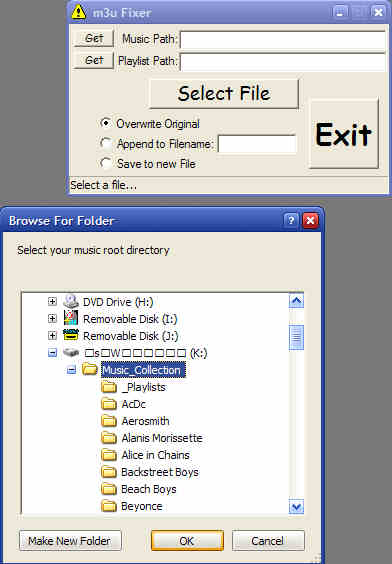
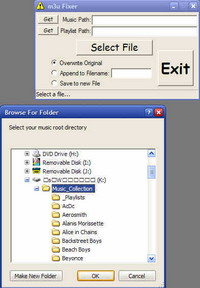
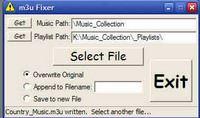
The first thing you want to do is to select the Get Music Path and navigate to
your Music Collection directory on your DMP1 Hard Drive:
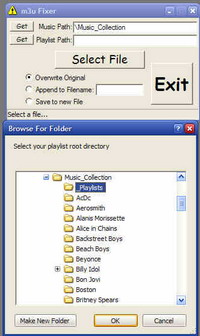
With that selected, you next want to select the Get Playlist Path and navigate
to where you have saved your play lists (which should be called _Playlists):
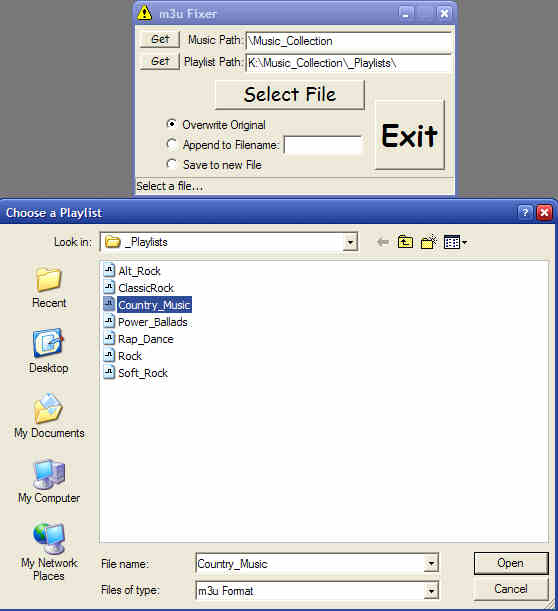
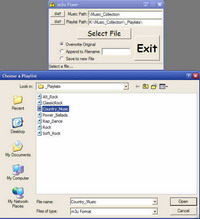
When those two are completed both of your directories will appear in the Music Path
and Play list Path box. Make sure you have them pointed to the correct directories otherwise
you will probably really screw up your play list and have to start from scratch again! Yes,
that is coming from experience. Trust me, it's not fun to have come this far only to have to
start over again.
Now M3UFixer is going to ask for which play list you want fixed. So, click on the
Select File button and select the play list that you just finished creating and then hit Open:
That's it! Unfortunately, there is no audible or confirmation dialogue box that opens on this
last step that tells you it has completed it's sole purpose in life. The only thing that
appears is some small text on the bottom of the program. If you see the text, you have successfully
created your first play list and everything is good to go, congratulations!
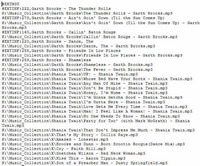
Just as an example or, to verify that the M3UFixer has done it's job you can fire up your
favorite Text Editor and open up the play list in it to check it out:
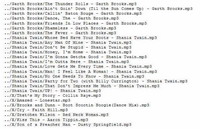
Notice how all the "garbage" is missing from the
play list now and all the
"\" have been changed to "/"? A lot easier then typing all of it in
by hand now, isn't it?
Previous Page
|
|
 |
|
 |
|